Have you ever worked in PowerPoint and tried to move an image to an exact place it just wouldn’t go? If you could (and sometimes do) spend hours making sure your PowerPoint images are in the perfect spot, try these five tips to get your images exactly where you want them in no time at all.
PowerPoint Tip #1 – Control
Instead of using just the arrow key or moving images around with your cursor, try holding down the CTRL key while using the arrow key. This way, your image will be nudged in the direction you want instead of jumping to a place that’s just a little too far (or not far enough).

PowerPoint Tip #2 – Align
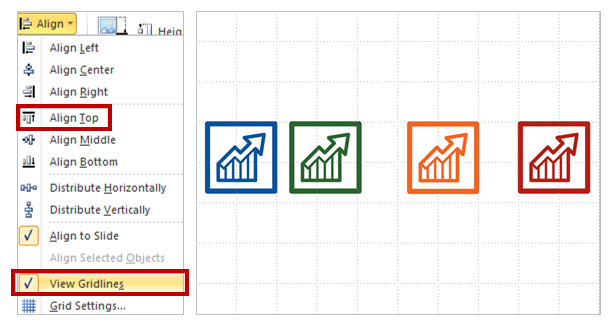
When you want two or more PowerPoint images lined up exactly, use the Align function (below). For example, if your images are aligned vertically on the page, click on one, then hold down the Shift key and click on the other images you’d like lined up with it (select all images). Select the Format tab, then click on Align. Next, click Left, Center, or Right to choose the appropriate alignment.
If your images are horizontal, repeat the same steps, but choose Top, Middle, or Bottom for your alignment options.

PowerPoint Tip #3 – Grid
The grid feature provides another way to align your PowerPoint images. Click on any image, go to the Format tab and select View Gridlines. When the grid appears, you will have a better idea of image alignment and spacing by using the gridlines as your guide.

PowerPoint Tip #4 – Distribute
When you have a bunch of images on a slide, it’s more pleasing to the eye when they are spaced out evenly. This is simple to do.
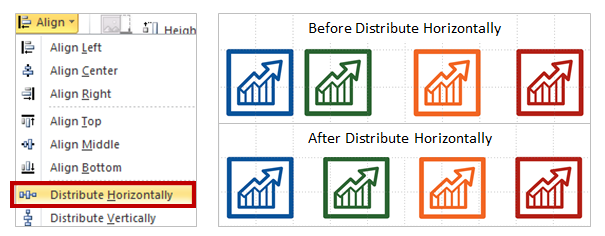
First, turn on your gridlines. Then, if your images are going horizontally across the slide, place the image on the far left and the image on the far right in the places you want them using the gridlines as your guide. Then select all images, go to the Format tab, click Align and select Distribute Horizontally. You can do the same if your images are vertical on the page by repeating the above steps and clicking Distribute Vertically. Now you have perfectly spaced images.

PowerPoint Tip #5 – Position
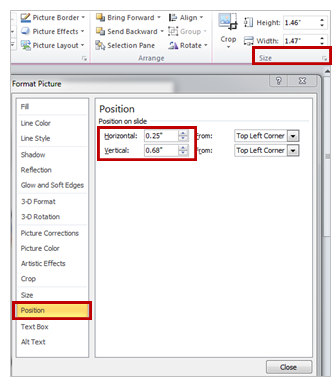
You can get really precise using the Position function. Click on an image, select Size and then select Position. Here you can manually change the horizontal and vertical position on the slide by putting your cursor in the text box and typing in a numerical value up to two decimal points.
This is helpful when you want images on different slides to be in the same spot. For instance, if you are creating a case study PowerPoint and each slide has a different logo on it, the position tool works wonders when it comes to getting them all in the same position on different slides.

That’s it! If you follow these simple tips, your PowerPoint images will always be put in their place.
